
Protocol Buffers(简称:ProtoBuf)是一种开源跨平台的序列化数据结构的协议。其对于存储资料或在网络上进行通信的程序是很有用的。这个方法包含一个接口描述语言,描述一些数据结构,并提供程序工具根据这些描述产生代码,这些代码将用来生成或解析代表这些数据结构的字节流。
protobuf主要解决了将对象型数据(基于OOP设计协议更易于理解)序列化成为一种字节流数据格式,至于数据最终被如何使用,需要设计者考虑。例如用于存储,传输。
准备工作
安装CMake
- 下载Cmake 官方下载地址
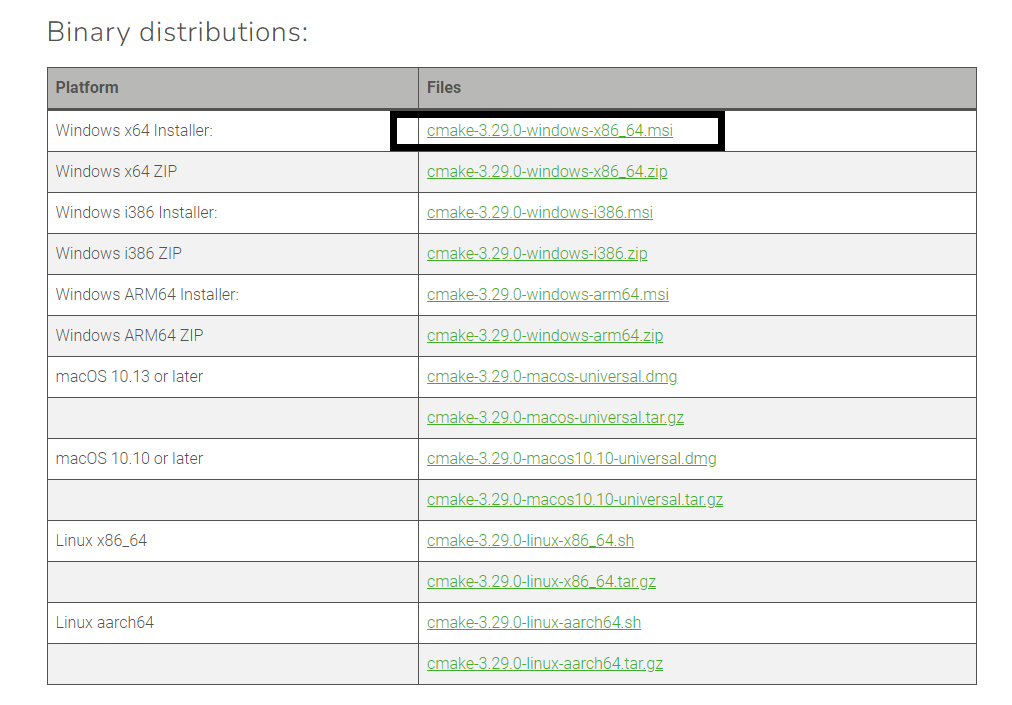
- 下载完成自己安装就行,安装完成会带两个程序,一个是无GUI的CMake,我们这里使用CmakeGUI
下载Protobuf源码
- 下载源码 protocolbuffers
- 可以用最新的,但是新版本强依赖Abseil你需要手动编译并链接几十个
absl_*.lib - 我这里用的是Protocol Buffers v21.12 这是目前公认的“最后一代纯净版”,API 稳定,且没有
absl的侵入性改动,完美兼容 UE4/UE5。 - 下载 protobuf-cpp-3.21.12.zip
- 如果你是git下载需要安装子模块,否则构建会出错
git clone git@github.com:protocolbuffers/protobuf.git
cd protobuf
git submodule update --init --recursive
使用CMake生成编译环境
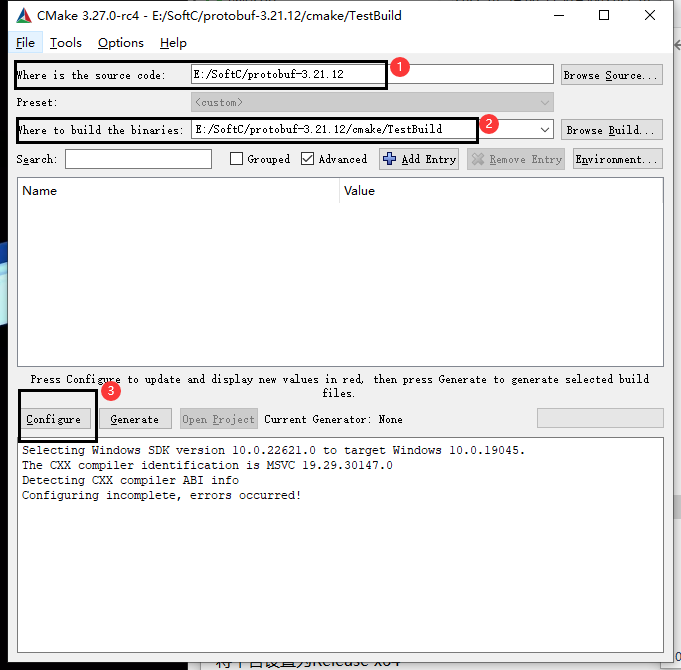
- 第一个就是源码路径
- 第二个就是要生成的目录,然后点击左下角的Configure
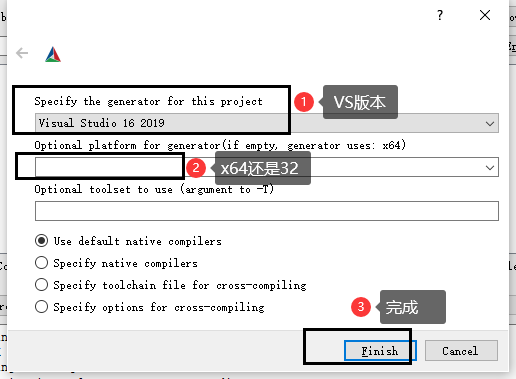
- 第一个是生成什么项目,我是2019的,第二个是什么平台,默认X64,然后点击Finish等待
- 如果出现错误那就是你没有安装依赖,子模块什么的,别看上面的红色,要看下面输出的信息有没有错误
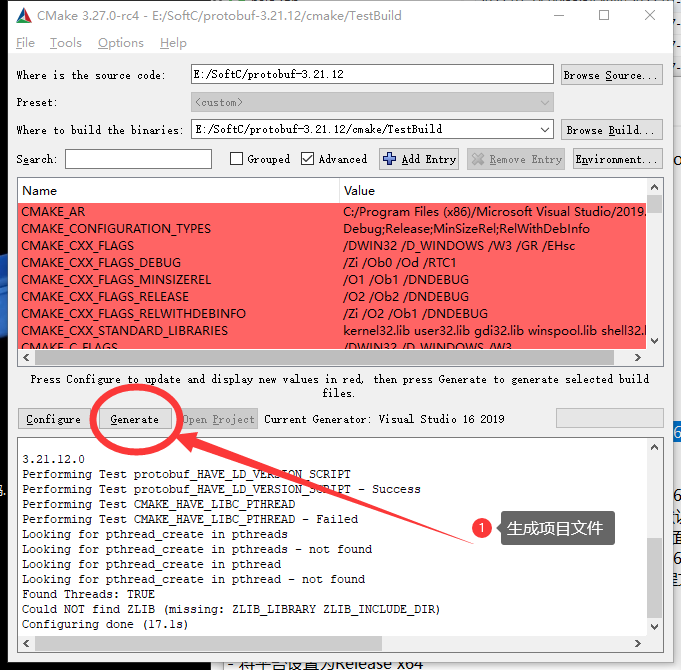
- 构建后是这样的,然后点击左下角Generate 这会生成工程文件
VS中编译Protobuf项目
- 打开你生成的项目protobuf.sln
- 将平台设置为Release x64

可能出现的错误
- 如果你在编译过程中发生错误,你可以根据错误提示修改运行模式,例如
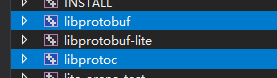
- 选中红框里的2个项目,右击>属性>C/C++>代码生成 设置运行库为 多线程DLL (/MD) 应用确定
- 里面有4个选项,对应含义如下:
多线程(/MT) :对应的是MD_StaticRelease
多线程(/MTd):对应的是MD_StaticDebug
多线程Dll (/MD) :对应的是MD_DynamicRelease
多线程调试Dll (/MDd) :对应的是MD_DynamicDebug
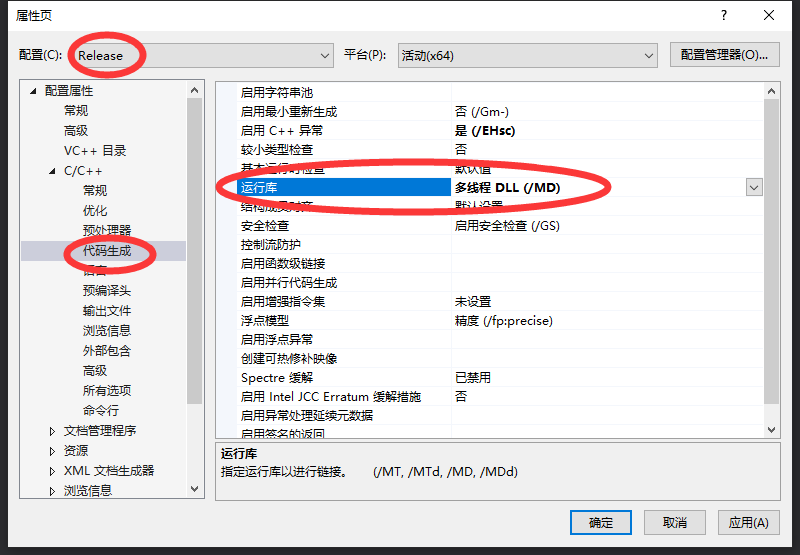
- 然后直接选中 ALL_BUILD 右击重新生成
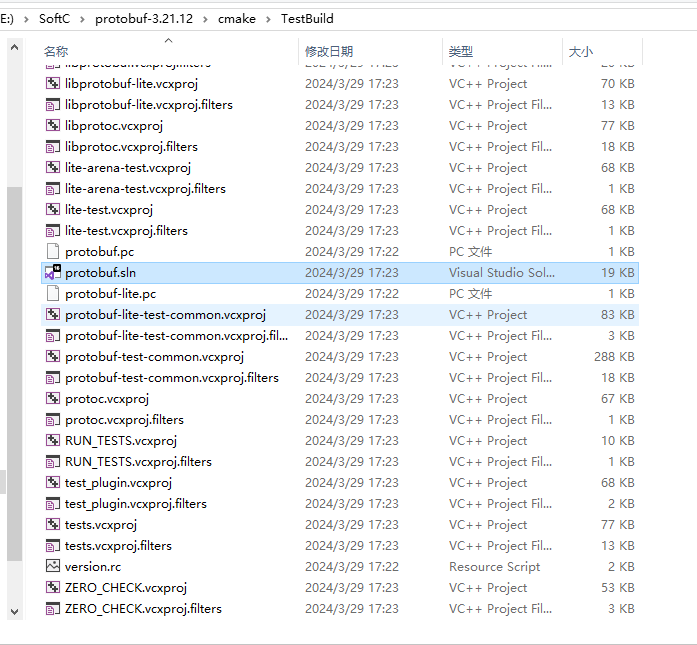
- 编译完成后,找到编译的文件
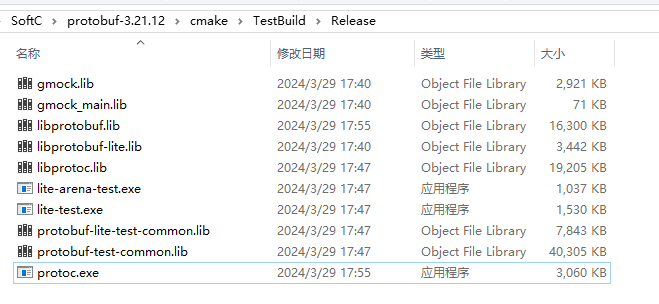
- 主要需要这几个文件,我们主要使用lib库文件
- libprotobuf.lib与libprotoc.lib是我们需要用到的
- protoc.exe是用来将.proto文件生成为对应编程语言代码文件的。
- 例如生成C++的
protoc 文件名称.proto --cpp_out=./
虚幻引擎引入
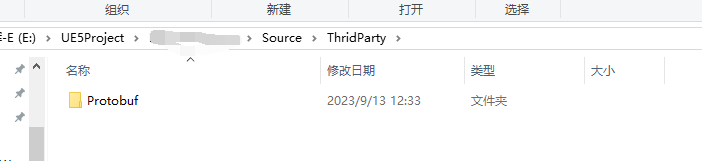
- 在你的项目源码文件夹Source下边添加ThirdParty文件夹,用于导入第三方Protobuf库
- 在下边在创建一个文件夹,例如Protobuf
- 在Protobuf文件夹下新建3个文件夹,bin include lib
- 下面再新建Win64文件夹,因为我们编译的是win平台64的依赖
- 把生成的protoc.exe放入bin文件夹(主要用来生成文件,可以不需要),libprotobuf.lib和libprotoc.lib放入lib文件夹
- 然后找到你的protobuf的源码文件夹下有一个src文件夹!
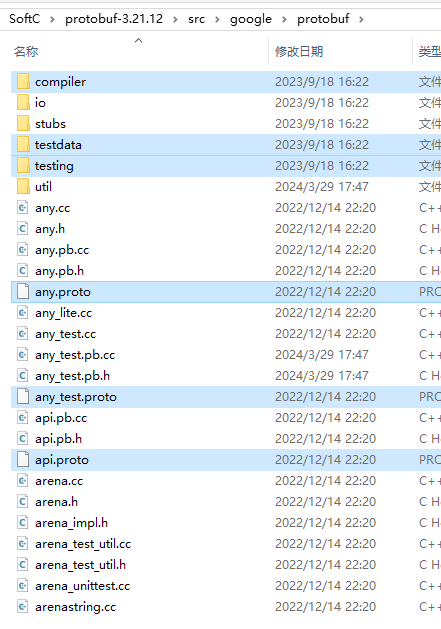
- 复制google文件夹到你的include文件夹
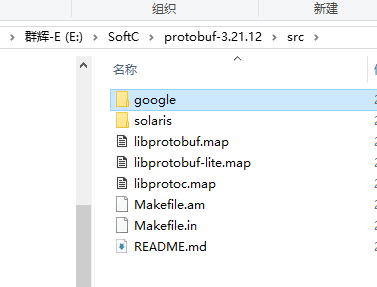
- 删除compiler,testdata,testing这几个没用的文件夹,下面的.proto文件啊一些例子也删了
配置Build.cs
- 找到你的xxxx.Build.cs
- 写入,注意,ThridPartyPath这个是我自己配置好的路径变量,这个你需要自己配置
- 相当于
Path.Combine(ModuleDirectory, "../ThridParty/")
- 记得引入System
using System;
using System.IO;
- 然后添加以下代码
if (Target.Platform == UnrealTargetPlatform.Win64)
        {
              PublicAdditionalLibraries.Add(Path.Combine(ThridPartyPath, "Protobuf", "lib", "Win64", "libprotobuf.lib"));
              PublicAdditionalLibraries.Add(Path.Combine(ThridPartyPath, "Protobuf", "lib", "Win64", "libprotoc.lib"));
              PublicSystemLibraries.Add(Path.Combine(ThridPartyPath, "Protobuf", "lib", "Win64", "libprotobuf.lib"));
              PublicSystemLibraries.Add(Path.Combine(ThridPartyPath, "Protobuf", "lib", "Win64", "libprotoc.lib"));
		}


        PublicIncludePaths.AddRange(new string[] {Path.Combine(ThridPartyPath, "Protobuf/include")});


         if (Target.Platform == UnrealTargetPlatform.Win64)
        {
            PublicAdditionalLibraries.Add(Path.Combine(ThridPartyPath, "Protobuf", "lib", "Win64", "libprotobuf.lib"));
            PublicAdditionalLibraries.Add(Path.Combine(ThridPartyPath, "Protobuf", "lib", "Win64", "libprotoc.lib"));
            PublicSystemLibraries.Add(Path.Combine(ThridPartyPath, "Protobuf", "lib", "Win64", "libprotobuf.lib"));
            PublicSystemLibraries.Add(Path.Combine(ThridPartyPath, "Protobuf", "lib", "Win64", "libprotoc.lib"));
		}

            PublicDefinitions.Add("GOOGLE_PROTOBUF_NO_RTTI=1");

        ShadowVariableWarningLevel = WarningLevel.Off;
        bEnableUndefinedIdentifierWarnings = false;
        if (Target.Platform == UnrealTargetPlatform.Win64)
        {
            bEnableExceptions = true;
		}

          PublicDefinitions.Add("_CRT_SECURE_NO_WARNINGS");
- 然后找到你的项目.uproject右击,Generate ....

在引擎中使用Protobuf
- 如果你是封装为模块了并作为模块使用,那你需要在你使用的地方的build文件里添加引用例如如下
PublicDependencyModuleNames.AddRange(new string[] { "Core", "CoreUObject", "Engine", "InputCore", "UEProtobuf" });
- 如果你是封装的插件,那就无视
- 然后你需要有一个xxxxx.proto文件 ,找到先前生成的protoc.exe
- 打开cmd,cd到这个目录,执行cmd命令
protoc xxxx.proto --cpp_out=./
- 如果你的proto文件没问题,你会得到一个** xxx.pb.cc** 和 xxx.pb.h 文件
- 将 .cc 文件放入你源码中的Private文件夹,.h文件放入Public
- 此时编译肯定是不通过的,所以我们要屏蔽掉一些警告
- 打开.cc和.h这两个文件,在第一行添加如下代码屏蔽警告
#ifdef _MSC_VER
#pragma warning(disable: 4946)
#pragma warning(disable: 4125)
#pragma warning(disable: 4647)
#pragma warning(disable: 4668)
#pragma warning(disable: 4800)
#endif
然后在你的cpp里添加引用
#include "xxxx.pb.h"
- 你就可以使用了
- 如果编译时出现下列错误
inlined_string_field.h(430): [C4668] 没有将“GOOGLE_PROTOBUF_INTERNAL_DONATE_STEAL_INLINE”定义为预处理器宏,用“0”替换“#if/#elif”
  inlined_string_field.h(430): [C4668] 没有将“GOOGLE_PROTOBUF_INTERNAL_DONATE_STEAL_INLINE”定义为预处理器宏,用“0”替换“#if/#elif”
  Microsoft.MakeFile.targets(45, 5): [MSB3073] 命令“"D:\Program Files\Epic Games\UE_5.1\Engine\Build\BatchFiles\Build.bat" ProtobufToturialEditor Win64 Development -Project="D:\Projectes\UE\ProtobufToturial\ProtobufToturial.uproject" -WaitMutex -FromMsBuild”已退出,代码为 6。
- 这个错误是因为需要在项目中配置预处理宏,用来管理是启用调试和非调试。修改方法如下:
- 到inlined_string_field.h文件中(双击错误跳转),将代码进行修改,参照如下:
#if GOOGLE_PROTOBUF_INTERNAL_DONATE_STEAL_INLINE
  lhs->get_mutable()->swap(*rhs->get_mutable());
  if (!lhs_arena_dtor_registered && rhs_arena_dtor_registered) {
    lhs_msg->OnDemandRegisterArenaDtor(lhs_arena);
  } else if (lhs_arena_dtor_registered && !rhs_arena_dtor_registered) {
    rhs_msg->OnDemandRegisterArenaDtor(rhs_arena);
  }
- 修改后
//调整此段
#ifdef GOOGLE_PROTOBUF_INTERNAL_DONATE_STEAL_INLINE
  lhs->get_mutable()->swap(*rhs->get_mutable());
  if (!lhs_arena_dtor_registered && rhs_arena_dtor_registered) {
    lhs_msg->OnDemandRegisterArenaDtor(lhs_arena);
  } else if (lhs_arena_dtor_registered && !rhs_arena_dtor_registered) {
    rhs_msg->OnDemandRegisterArenaDtor(rhs_arena);
  }
- 再次编译即可通过
到此将protobuf引入虚幻引擎5.1.1 结束